Tag Archives: house updates

Get Those Walls Up

Well, it’s been one heck of a week, getting ready for painting on Saturday! A bunch of our friends are coming over to help paint tomorrow, so we had to meet our deadline by Saturday! And by golly, I think we’ve done it :)

Here’s a little preview of what we’ve been working on, and a reminder of what we started with. (I hope you like the flashbacks as much as I do b/c I just can’t contain myself!)

This was the view of our dining room. This wall was just plywood, causing a ‘hollow’ sound when you would knock on it. And we weren’t crazy about the texture on the wall either. And the brown paint. I think they were trying to replicate a tree. To each their own. But it had to go!
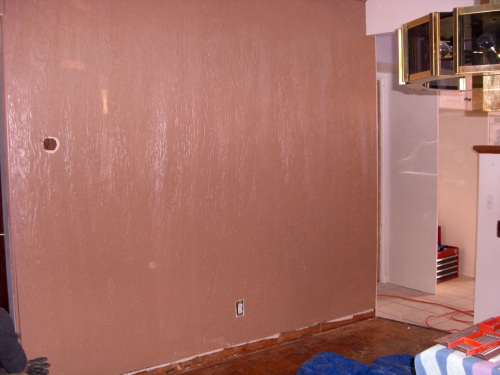
So we took it down….  one of our very first projects!

And then we were left staring at this for the next 2 months!
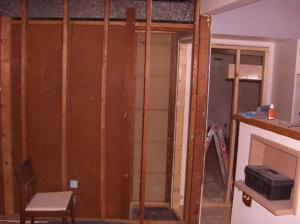
Once we were finally able to start drywalling, I was ecstatic to get my wall back!! First, we put some insulation in it for a sound barrier (which I didn’t take pictures of). And now we have this:

Oh happy dance! Look how nicely I seamed that drywall! Woo-wee have I become a pro by now or what?! And this is before our final coat, so it’s feathered a bit farther out then shown here.

I can’t wait to get it painted! It’ll finally be done :)

Next up, we had to drywall some of the Master Bedroom.

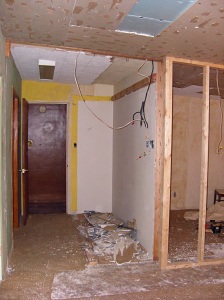
Here is the view when you walked into our room:

This is an OLD picture. So much has changed since then. The wires hanging down have been taken care of by our electrician. The ceiling is now completely mudded and waiting for paint. And that wall to the right is the one we had to rip down and then drywall this past week. Here is a better view:
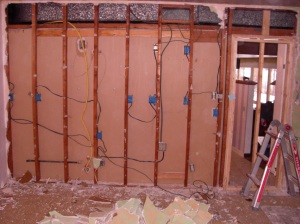
We also boarded up that extra doorway leading into the kitchen to give our room more privacy. Oohh la la :) just kidding. *Ahem*

Once the electrician did all of his work on this wall, putting in new outlets & re-wiring a few things, we decided to insulate this wall as well, for a sound barrier from the kitchen. Again, no pictures of the insulated wall….not very exciting.

And now we have this:
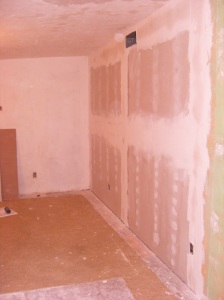
You can see the mudded ceiling, the drywall, and the no-longer existing doorway to the kitchen :) I can’t wait to get this room painted this weekend.

Painting to me indicates the last step of the process ….the light at the end of the tunnel…. the return of my sanity!!

And as for this wall in the bedroom….we have a little secret to share. The ‘green’ part of the wall was plaster (original from the house) which was 3/4″ thick. Our new drywall was only 1/2″ thick. Therefore, we had 1/4″ difference of wall to ‘feather’ out. It may not sound like much, but it was a huge difference between the 2 walls, and put my mudding skills to the test! HA! I’m hoping it looks ok once painted, but perhaps the pros will shun us from ever drywalling again. OKAY by me! But heck, you have to do what you have to do. And I’ve feathered this puppy even farther than the pic shows (that was only the 2nd coat!).

So on to painting tomorrow. I can’t believe the master bedroom is only 1-step away from being finished! As well as our walk-in closet who will also get a fresh coat of paint. And maybe we’ll even get a chance to tackle the dining room wall and kitchen :)

Stay tuned….

*Kristin*

Whatcha Whatcha Waitin’ For

I don’t think anyone will get the reference in the title unless you’re super obsessed with Brit’s new song like me! 

Whoa oh oh oh oh OH oh…..Keep on dancing ’til the world endssssssss…..

Ok, sorry….it’s a bit hard to sing along and type at the same time! But I’ll try my best :)

*ahem*

After badly neglecting this blog, I’m back with an update. A BIG update. Ross & I have been working like crazy every night and every weekend, trying to get the house move-in ready by May 1st (our tentative hopeful goal).

Here’s a little update on what we’ve been up to…

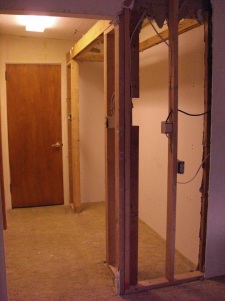
Ross got the wall up for our new walk-in closet in the Master Bedroom a few weeks ago:

Since then the electrician has gotten all the wiring done in the house, allowing us to finally start drywalling. The door isn’t quite installed yet, it’s only propped open holding itself up! But you can see where the new light switches are, and that recessed white box in the wall will be for our future wall-mounted flat screen tv for prime tv-watching-while-eating-relaxing-in-bed :)

Remember this??

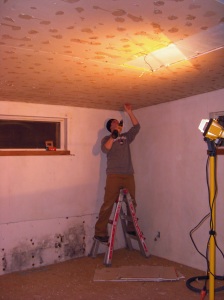
That was our hideous ceiling in the master bedroom, straight out of your standard office?! It was ugly. So we tore it down. Why not add to our project list, right?! Especially when we had no clue how we would fix this, just that the current ceiling HAD to go! And then we did a lot of this:

Ross had to go ahead and screw 4″ screws into the ceiling. The ceiling was currently being held up with nails that were slowly pulling out. Great. Nothing like having your ceiling fall down on you when you’re sleeping! So we fixed it. And I can safely tell you that our ceiling is never coming down now! We also had to manually scrape off all of the glue that was holding up those ceiling tiles. That was a painstaking process.  And we were also left with holes in the ceiling where the old fluorescent light fixture was that we removed. What can I say…fluorescent lighting isn’t exactly the most calming?! It had to go:

Now the ceiling was ready for mudding after Ross patched the hole where the flourescent light fixture was. Bring on the texture:

Betsy & I began mudding it by hand with drywall compound to see how it would look. We put up a thin layer of mud and then go back over it lightly with the putty knife to give it a bit of texture. It’s coming along great and I’ll give you an updated pic once I’m all finished! I’ve made quite some progress since this photo. Also, notice the light bulb??  It’s so great having light in the house. Thank you new best friend electrician :)

Moving on, remember this problem?

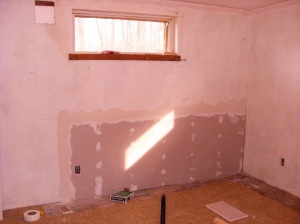
Mold Alert! Ugh. What a nice surprise when we removed the wallpaper in the master bedroom. So we cut out the drywall, and the first layer of styrofoam that they used for insulation.

Now we have a clean slate :) Is anyone else confused why the previous homeowner’s needed 3, YES 3(!), outlets within 4 feet of each other?! Humph. Granted, I know sometimes it seems you could always use more outlets, but there are a total of 15 outlets in this bedroom alone. I think we were able to part with just a few. So we asked our new best friend to fix that too :)

Ross got the new layer of styrofoam in, and a new piece of drywall.  I did the mudding for the drywall seams. This was only my first coat of drywall mud on the seams, so it’s not ‘feathered’ too far, in case you were curious. But back to the drywall mudding, I love it. Maybe a little too much. I like to consider myself a pro at this point since I did many more seams after this one :)

Last but not least, remember the original closet we removed?

We decided to tear it out so that our entrance into our room wasn’t directly through a closet (since we closed off the 2nd doorway, more on that later). This was one of our very first projects. Here it is down to the bones:

And then gone:

And here’s what we currently have:

What a nicer entrance into our room, huh? Once I get some decor up on that wall, and possibly put a dresser or vanity along that wall, that space will feel like it’s always belonged.

So it’s all coming along now! This is the part of the process that I looked forward to, where you finally start to put things back together and see your improvements and hard work pay off :) I can’t wait until it’s completely finished! Aside from the master bedroom, we’ve been painting the living room/dining room/entryway like maniacs, and I plan to update you with pictures on that soon!

*Kristin*

How to Cut Ceramic Tile

Well since I am on a roll of learning how to appropriately blog about home renovations, I might as well throw in a how-to about cutting ceramic tile.  I was hesitant to take on the task of cutting away ceramic tile in the house for fear that I might shatter the existing tile that was laid down in the house.  The thought process being that if I cracked one tile, I wouldn’t have any new tiles to replace the one that I broke.

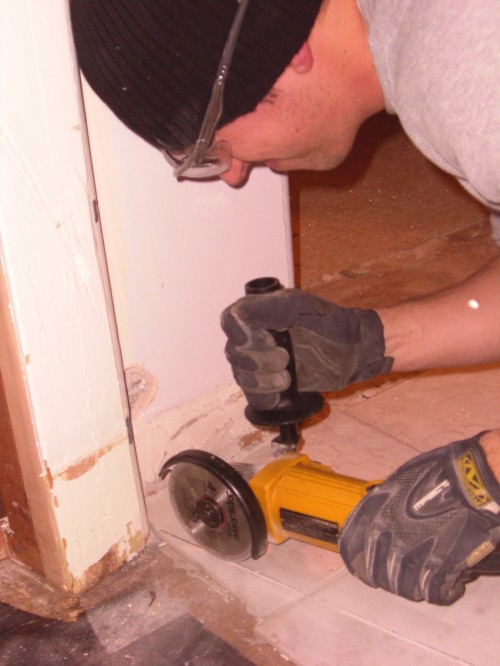
Well, I was daring and went for it anyway.  I discovered through professional contractors that you can indeed cut ceramic tile and have a minimal failure rate if you use the appropriate tools and methods.  I went to my local home improvement store and purchased a 4-inch masonry blade with a diamond plated end for to fit the angle grinder that I was using.  Make sure that you purchase the flat blade instead of the serrated (jagged).  This was the best $10 purchase I’ve made in a while!

So to start off, I marked a straight line across the tile where I wanted to cut using a straight edge and a marker.  Once I finished that I installed the diamond plated blade onto the angle grinder and slowly made my way along the line that I had drawn on the floor.  I made several runs across this line (the first one being maybe around 1/8 inch deep).  The next line I went a little deeper and so forth until I just about made it to the bottom of the existing ceramic tile and glue that was holding the tile down.

Below is the cut that I made beside the line and it turned out very nice!  I just took the process slow and steady.  If you attempt to do this, make sure you have a steady hand for sure.

I will say this, be ready to experience the indoor dust storm of your life!  Ceramic tile kicks up quite a bit of dust so make sure that you cover up anything that you don’t want to get dusty.  A creative technique that Kristin and I used during this adventure was to have a running shop-vac with a wide-mouth opening to suck up a good portion of the dust that was being shot behind me while I was cutting the tile.  She had her safety mask respirator on as well as goggles since she was the lucky soul to be blasted with the dust.  Don’t worry, though, as I was clear from the line of fire with the dust!  The wife is going to hurt me for that comment!  It was quite funny to see but it did work out rather decently.  I could only imagine how much dust would have been blown around if we didn’t do that!

Anyway, the next part was using a 3/4 inch chisel to pop up the cut tile.  A few small hits on the butt-end of the chisel with a hammer and viola… the tile broke off cleanly!  This once hesitant individual is now much more knowledgable on how to safely and appropriately cut and remove existing tile now.  I will say that this method was actually quite painless… the hardest part was the cleanup from all the dust that was generated from the whole process.

-Ross