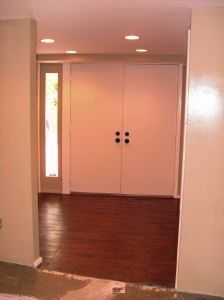
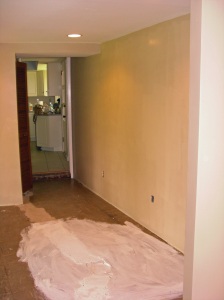
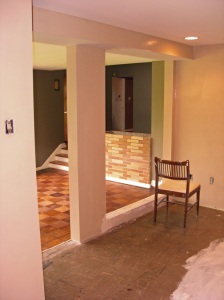
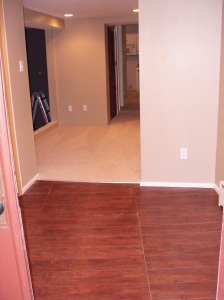
HELLOOOO Ikea :)

I love IKEA!  Except I’ve recently formed a love/hate relationship with them due to their amazing prices and stylish furniture, but at the cost of building things on your own. Ugh. At least they provide you with the tools….right?
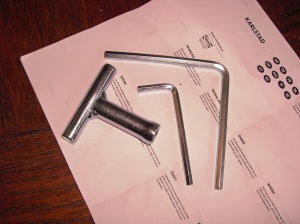
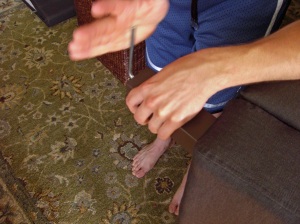
Wrong…it would’ve taken us forever if we used their tools! Instead, we whipped out the power tools :)
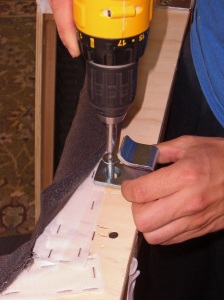
There were a few instances though when we had to use their tools. But that’s ok, I guess I was just happy that they DID supply something if you had nothing better to use. Good thinking IKEA :) You’re always there for us!
This sectional had to be lugged home in 2 separate trips. When we bought it, we thought it would fit into an SUV, aka….I thought it would fit into an SUV. More specifically, a Crossover! I’m not sure WHAT I was thinking! Apparently I constantly UNDER-estimate the size of things, time it will take to complete a project, and just about everything else in this world. I’m working on my perception of things! This was only the first trip…

Perhaps no one has to mention to my mom that we had to strap a box to the top of her vehicle?! M’Kay? Thanks. Ok, let’s move on….

SINCE we could get it strapped on top, with NO help from the IKEA salespeople, since apparently they could be liable if they helped (!), we made it home in only 2 trips. Otherwise, it would’ve taken 3 trips. I guess we should be lucky that we only live about 45 minutes from IKEA, but that still takes up the better part of your Sunday….or my sunday. Not the hubs. He stayed behind for the 2nd ride! But he worked on the garage instead, so he wasn’t a total slacker :P

One of the first projects we did when we finally got it home, was spray paint the legs of the sofa. They were originally a birch color, like so….
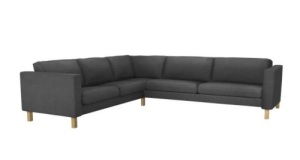
We took note from Young House Love, who bought the same sectional a few months back, and came up with the smart idea to spray paint the legs a brown metallic to make them look more ‘high end.’ We opted for a Brown Satin spray paint instead…the sparkles in the metallic color scared the hubs a bit! Here’s a close-up of the finished product…
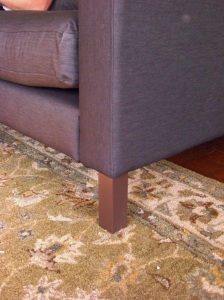
I love the dark color much better! It definitely makes it feel more substantial and gives the legs more ‘weight,’ so to speak.

We also opted to buy the sectional in the Sivik Dark Gray (which was also the same color choice as Young House Love’s sectional, but not the reason why we chose the color!). The hubs wanted the dark gray b/c he thought it would hide stains and messes better. I agree! After I originally wanted to buy it in a beige. I’m so glad I listened to him. See…I’m learning to listen after all!

A few other things to mention about why we decided on this sectional was because the size of it fit perfectly into our living room. ALL sectionals that we looked at were too big. I felt defeated! I also wanted it to be completely slipcovered so that I could remove the covers and wash them, if needed. After all, we have a dog, and will one day have future kiddos that this will have to hold up to. There’s nothing better than being prepared! And once the hubs gave me the okay….my search was finally over!

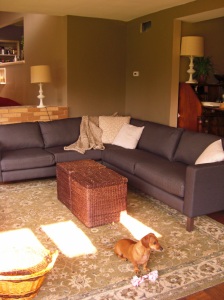
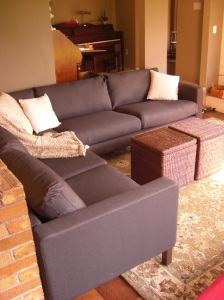
So after about 3 hours total of building our couch , here is the end result!

Drumroll pa-lease……
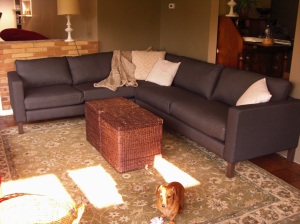
I usually don’t steer towards ‘modern,’ but THIS I love! I love the clean, classic lines. I think it fits in nicely with the style of our house. And I love the color, which when we brought home, I was freaking out because I thought it looked more blue than gray. My fears are gone, and I’m happy with the color choice….but alas, IF we ever decide we want to change the color….a completely customized slipcover for our Karlstad Sectional costs only $299!!!

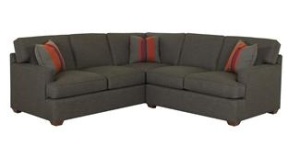
You sure can’t beat IKEA’s prices. The total cost of our sectional was only $899 (including the slipcover). That sure beats the $1,800 sectional we originally wanted from Sheely’s furniture outlet (which we would’ve bought in the 3 seat/2 seat configuration)…

Pretty similar, huh?

My only comment about our sectional is that the cushions are stiffer than when we tested it out in the store. But that just gives me more reason to ‘break it in,’ since the store model was oh-so-comfy :)

Anyway, I’m so happy with our choice, and it sure helps that we saved almost $1,000!

*Kristin*

Fresh Coat of Paint

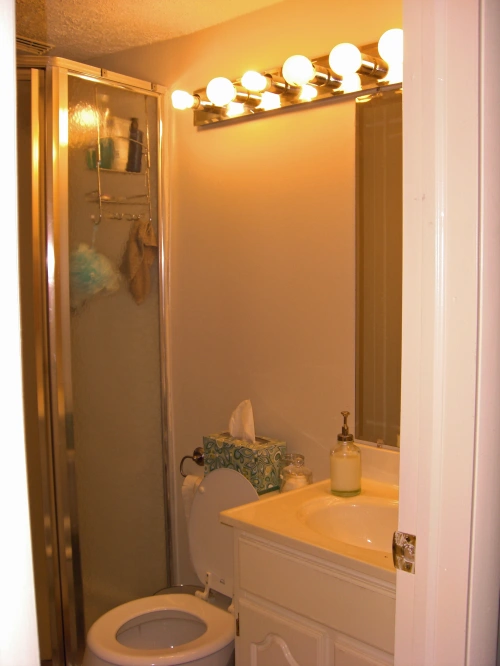
The small bathroom that Ross & I have been using since moving into our house a few weeks ago, finally has a fresh coat of paint!! No more spackle showing on these walls :) I painted it the same color as our kitchen, a light beige, since this bathroom is right off of the kitchen and I wanted a cohesive look, as well as a neutral color. We also finally installed our new bathroom hardware for our towels that I purchased at IKEA a few weeks ago. The first time I installed the toilet paper holder, it was loose since it wasn’t really secured into anything. A quick trip to Lowe’s to buy wall anchors was the fix!! And I will brag mention that the trip was done with me alone, and no guy telling me what I would need to buy…I knew just what I needed to get the job done!

Here’s a look back at the ‘before’:

That would be pink on the walls. Yuck.

And the ‘after’:

Ross & I still want to switch out the light fixture, and possibly replace the mirror one day…but for now, the paint color has made such an improvement, that I’m happy to live with it ‘as is’ for the time being!

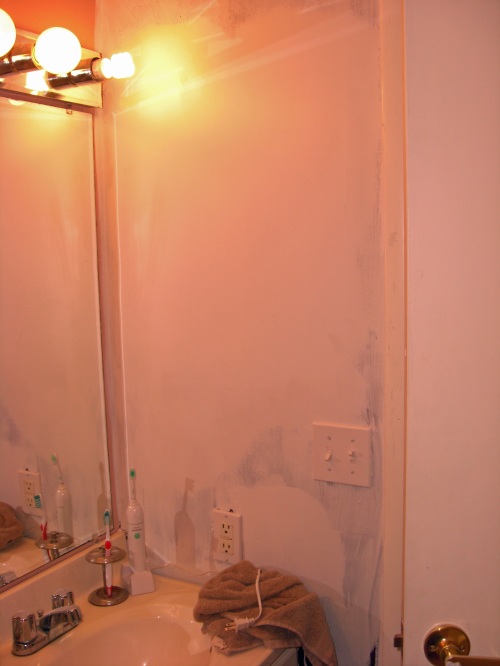
Another ‘before’:

This wall originally had a built-in medicine cabinet, but it didn’t make sense to me to have 2 mirrors adjacent to each other, so we removed it. I thought about putting ‘built-in’ shelves in this wall too, but alas, since this will eventually be a guest bathroom one day, I didn’t want anyone looking at our ‘clutter’ so I patched it up. The entire wall needed to be patched and then mudded, sanded & primed.

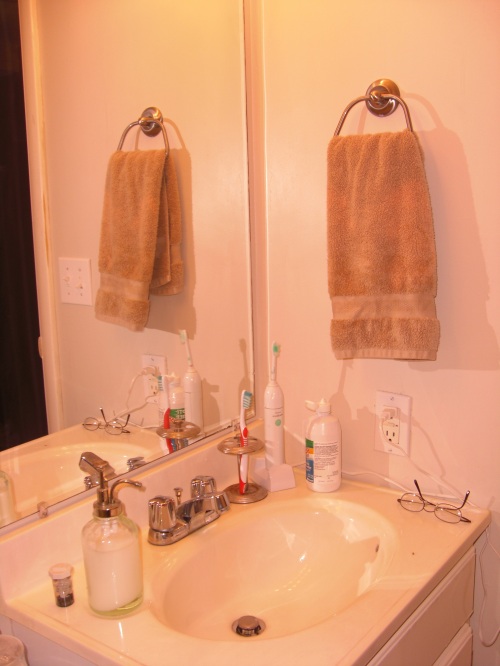
‘After’:

Please excuse the hubs clutter :) Like the new IKEA towel holder? Sure beats laying the towel on the sink like in the ‘before’ photo. And this thing is as sturdy as can be thanks to those wall anchors!

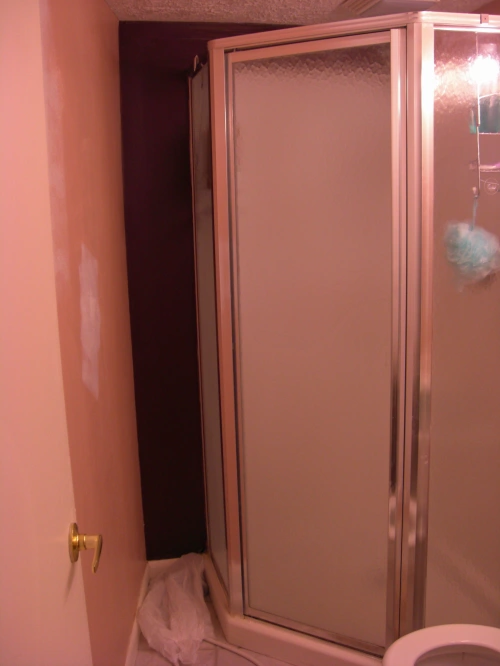
‘Before’:

Yes, that back wall is dark brown. Still not sure how people come up with these color combinations!

‘After’:

So refreshing :) It all looks so clean and put together finally.

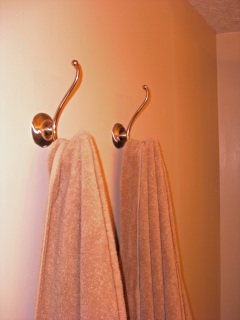
Do you like our other new IKEA towel holders?

I thought they were a little more whimsical than just putting up a towel ‘bar’ to hang our towels. Besides, I wouldn’t be able to pay the hubs to fold his towel on a daily basis, so hanging them was a way to please everyone!

Next up on my agenda…finally finishing our Living Room window treatments :) I can’t wait!

*Kristin*
Fallingwater

This weekend, Ross & I were down at OhioPyle State Park camping with friends for the long weekend. On Saturday, we finally took advantage of checking out Fallingwater while the rest of our group was white-water rafting.

We’ve been wanting to see Fallingwater for the longest time, but never took the chance or wanted to spend the money! Since my back is still healing and Ross’ hand is injured, there wasn’t anything more adventurous for us to do but check out one of Frank Lloyd Wright’s most famous pieces. But I’m sure glad we did!

The grounds leading up to the house were beautiful in itself…..

I couldn’t help but keep snapping photos as the rest of our tour group was walking along!….

Ross pointed out how much he  liked this tree, so I snapped away. And look how beautiful it came out! I just might add this to our collection of wall art :)  Of course, there’s never a time when a little PhotoShop can’t help but to emphasive its features…

And then on to the house! You’re not allowed to take photos inside the house, but they did have a gorgeous view carved out across the river where I snapped a few more pictures… 

Frank Lloyd Wright certainly did have the right ideas when he was designing this house.

And it just makes me wonder what any current home developer is thinking when they come to build a new housing plan, and mow down all the trees and landscaping before building. How could you possibly say ‘No’ to this scenery and the beauty of the land?!!

I didn’t get any pictures from our actual camping trip, but it was nothing more beautiful than what you already saw here :)

*Kristin*
Our Organized Chaos

Oh the humanity!! I can’t believe I’m going to show you the mess that we’re living in! HA…

Just kidding. I’ve been extra lazy this week, and I can’t say I mind for once :) The boxes will get unpacked as we slowly get organized….so please, no judging! We are thoroughly enjoying our new home!

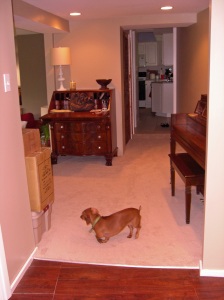
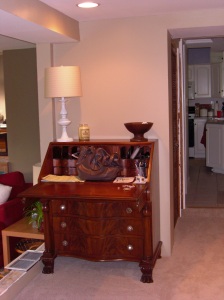
So let’s start off in the entryway:

Ross & I inherited this hutch from my family. I think it’s such a unique piece to own and glad that it fit nicely in the den, since it was the only place I could find to put it!

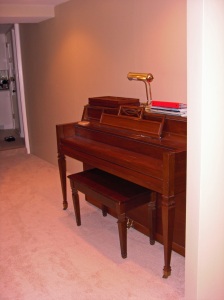
And of course, you can’t ignore my long awaited piano! In our 4 days of waiting for tv & internet to be hooked up, I’ve reacquainted myself with the music I used to be able to play! It’s gotten pretty ugly since then :)

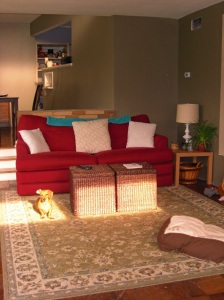
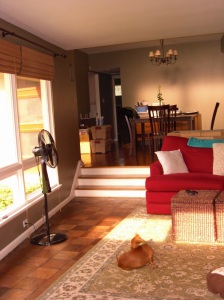
Next up, the living room. Dakota LOVES to sunbathe….

Don’t you just the love the RED couch and GREEN carpet? Feels like Christmas already. (just kidding!)

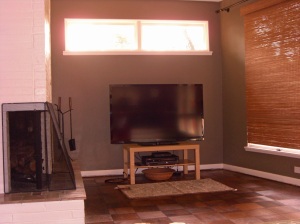
The other side of the living room…

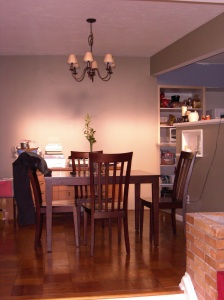
Dining Room:

Ross has made it a bad habit to throw his work clothes on the dining room chair every night after work. I vow to break his habit!! AH.

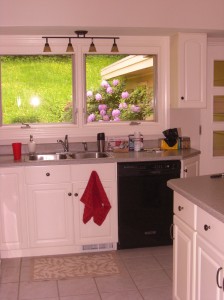
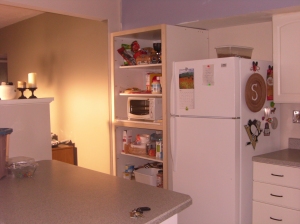
Next up, Kitchen:

My favorite part of the kitchen? The big window behind the sink that looks out into our private backyard (complete with pretty purple flowers of some sort…my mom could tell you what they are, but I have no clue!! HA)

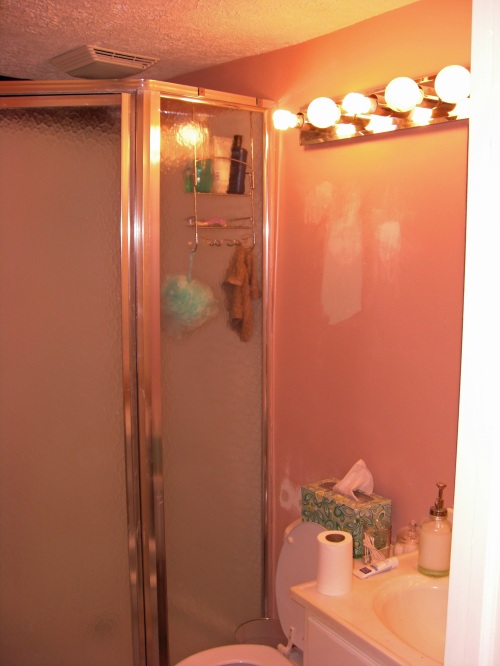
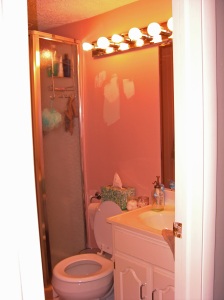
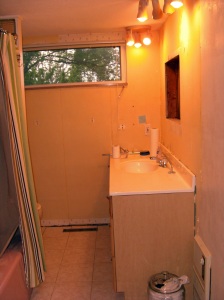
Here’s the small bathroom we’ve currently been using. The shower is SMALL, the entire bathroom is SMALL…but functional. And yes, the walls are pink (and brown, though you can’t see it). And NO…this is not the bathroom I nicknamed ‘the pink bathroom.’ That one is MUCH worse…let’s just say – pink bathtub, pink tile, pink walls….eek. This is somehow the better of the 2 bathrooms. But hey, at least I spackled before moving in (see above the toilet!). And one day I’ll get around to painting it :)

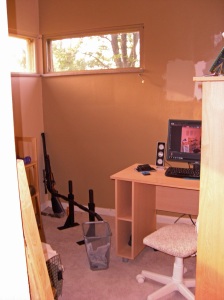
And then we have the 3rd bedroom/office. Again, we didn’t get around to painting this, even though I have paint samples on the walls. We’ll use this room for our computer and random workout gear for now.

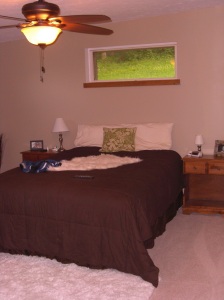
Master Bedroom:

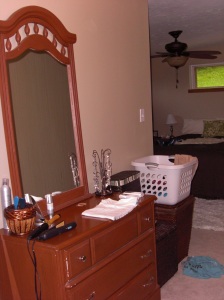
Here’s what you see when you walk in. I originally planned on putting a nice sitting chair and decor elements in the entrance, but functionality rules and I needed a place to do my hair :) So here it will stay until I find a better place for my hair stuff.

You know what I love most about our bed? The 2 matching bedside tables :) HAHA….it’s the simple things in life. For whatever reason, Ross & I dealt with mismatched (or none!) bedside tables since we’ve been married. But since my mom & dad recently bought new bedside tables, they passed on their old set to us! I plan to repurpose them somehow. But for now….functionality wins again!

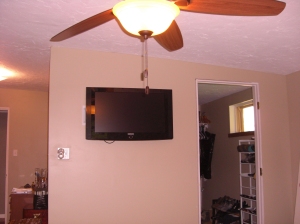
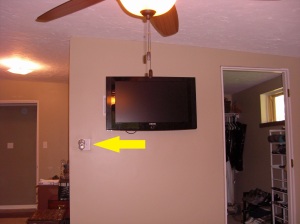
I can tell you Ross’ favorite part of the bedroom. Take a look from our bed:

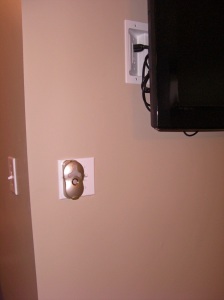
And see that little thing on our lightswitch?

Don’t call us lazy…that would just be our remote control for our CEILING FAN! Ahahahaha. Heaven forbid I have to walk 5 steps to adjust the setting :) This is Ross’ 2nd favorite item in the bedroom!

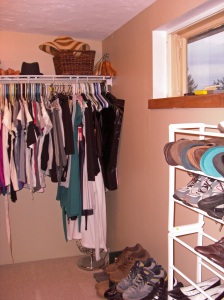
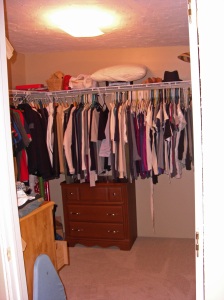
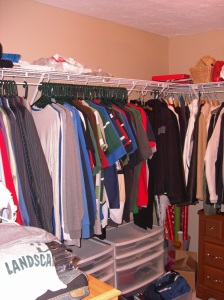
Next up, the walk-in closet. Which is embarrasing how FILLED it already is. So here goes nothing:

And I promise you, about half of my wardrobe is from high school. I haven’t gone shopping since before Xmas thanks to the house eating up our paychecks! HA. And the other half of my closet? About 6 white t-shirts, and 5 gray t-shirts….which I forbid to donate any of them, b/c I like them all for different reasons. So maybe that’s my wardrobe has no variety??

Here’s the 2nd bedroom, aka storage space!

 And yes, one wall is pink, the other is green. Not sure how anyone comes up with that combination!! haha

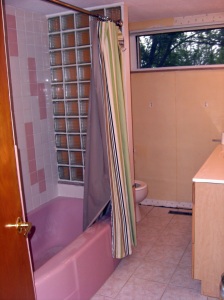
And last but not least…the pink bathroom:

So what could make a pink bathroom even worse? Possibly the green striped shower curtain! haha  It’s what I had in our last apartment, and just threw it up, even though we’re not using this bathroom at all.

But now that I think about it…doesn’t this bathroom match the 2nd bedroom too perfectly?!?! HA

Well, that’s it for today! Hope you enjoyed our cluttered house :) I know we sure do.

*Kristin*
Before & After(?) (Part 1)


Welcome Back! I’ve got so much to up date you on, I don’t even know where to begin :)

We haven’t gotten to the exterior of the house yet, but I love my front door ever since my mom bought me 2 hanging flower baskets, and we removed the ‘faux’ carpeting on the entryway.

Next up, the entryway/den…

Now, I could easily just show you before and after photos, but what fun is that when you don’t see the blood, sweat and tears put in behind the all the work? And trust me, the ‘blood, sweat and tears’ is a literal quote!

Starting off when we bought the house…

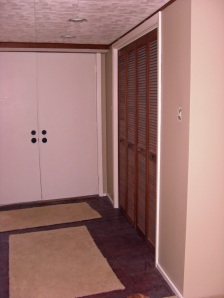
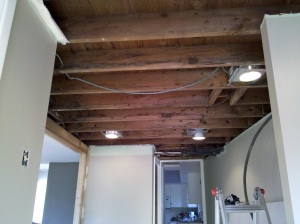
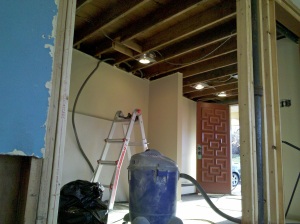
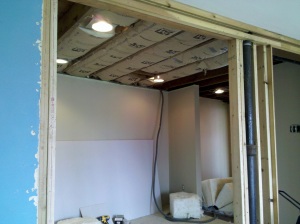
This is after we painted. It doesn’t look all too bad, but the ceiling drove Ross & I nuts. It was a drop-ceiling, and the tiles had the look of what you would see in an office building. So down it came….

I’m really happy we decided to take down the tiles after all b/c the insulation deteriorated as soon as you would touch it. So down that came as well. It obviously wasn’t serving it’s purpose anymore. We went out and bought R38 insulation since we have a flat roof and no attic space above to keep us warm. We wanted to make sure that this ceiling was insulated as best as we could get it. And after doing research on the internet, R38 seemed the best option. But the stuff isn’t cheap, and we ended up with a tidy bill of over $250 just to re-insulate the ceiling! Geesh. For such a small room, I was a little shocked. But I’m sure our heating bill will thank us one day :) And if we’re going to do it once, we might as well try to do it right…and hopefully the stuff will last another 50 years!

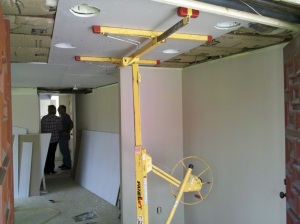
And then the ‘fun’ began. Meet our new best friend….Mr. Drywall Lifter (er….that’s what I called him!)…

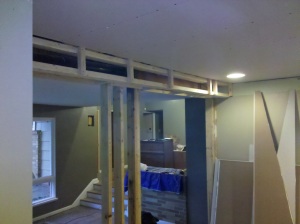
Thanks to Home Depot…you can rent this guy for just $35/24 hrs.  We returned it just in time before our 24 hours was up, so it was well worth the $35!  Once we had the drywall up, we had 3 bulkheads to build to hide various pipes since this room was originally a Utility Room back when the house was built in the 50’s.

After the bulkheads were built, it was on to mudding/taping/painting/triming, and all that fun stuff. *Side note: Sanding mud above of your head allows for many particles of dust to get caught in your contacts…that’s where the ‘blood, sweat and TEARS’ came in to play! HA….

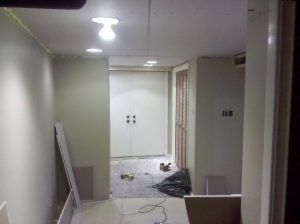
Here’s the finished look of the ceiling. It looks even better in person …and Ross and I both agreed that this was our proudest accomplishment. Sadly, no one will ever notice what we did since it looks like it’s always been there…but we sure notice, and it was worth every ounce of effort! Even the bulkheads look like they’ve always belonged….

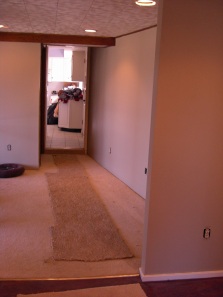
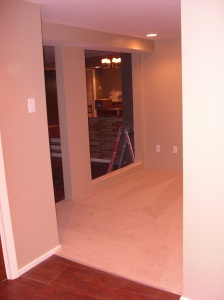
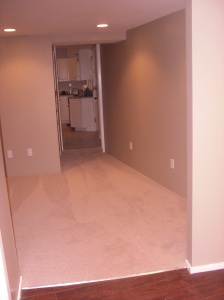
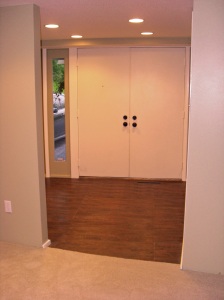
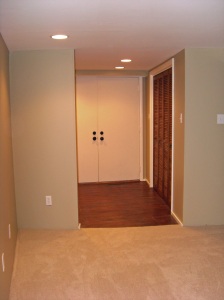
The white paint on the floor in the picture above was primer, so our floor ‘levelor’ would adhere to the floor. I betcha wanna hear all about that project too, huh? Nope, you’re right, it’s not very interesting. Let’s move on to the final result with our newly insulated carpet (of which I have to say, I LOVE the color we chose…call it ‘beige’ or ‘white’ if you want, but there were SO MANY beige carpets to choose from, it was all a little overwhelming! And many beiges steered towards yellow too much, so we found the perfect balance.)

Fresh paint…fresh carpet….clean wood floors…clean HOUSE, now THIS is what I call home :) (Wait…does that make me sound high maintenance?!)

Welp, that’s it for tonight. The rest of the house tour isn’t quite as consuming, so I’ll post those pictures soon! Until then, I’ve got to finish getting ready for move-in day. T-minus 2 days!! :)

*Kristin*
 

Get Those Walls Up

Well, it’s been one heck of a week, getting ready for painting on Saturday! A bunch of our friends are coming over to help paint tomorrow, so we had to meet our deadline by Saturday! And by golly, I think we’ve done it :)

Here’s a little preview of what we’ve been working on, and a reminder of what we started with. (I hope you like the flashbacks as much as I do b/c I just can’t contain myself!)

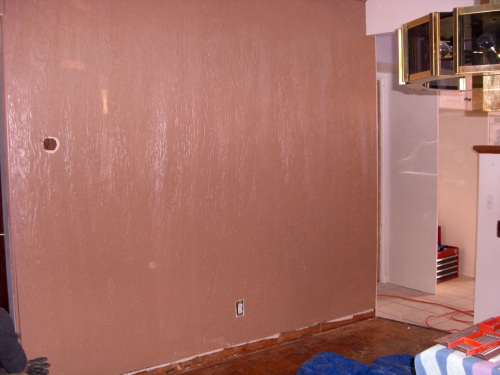
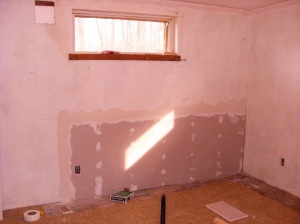
This was the view of our dining room. This wall was just plywood, causing a ‘hollow’ sound when you would knock on it. And we weren’t crazy about the texture on the wall either. And the brown paint. I think they were trying to replicate a tree. To each their own. But it had to go!

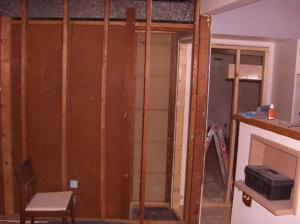
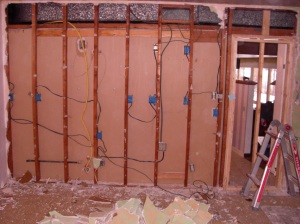
So we took it down….  one of our very first projects!

And then we were left staring at this for the next 2 months!

Once we were finally able to start drywalling, I was ecstatic to get my wall back!! First, we put some insulation in it for a sound barrier (which I didn’t take pictures of). And now we have this:

Oh happy dance! Look how nicely I seamed that drywall! Woo-wee have I become a pro by now or what?! And this is before our final coat, so it’s feathered a bit farther out then shown here.

I can’t wait to get it painted! It’ll finally be done :)

Next up, we had to drywall some of the Master Bedroom.

Here is the view when you walked into our room:

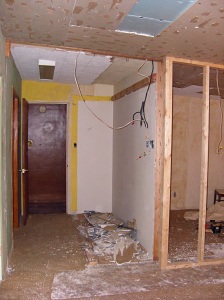
This is an OLD picture. So much has changed since then. The wires hanging down have been taken care of by our electrician. The ceiling is now completely mudded and waiting for paint. And that wall to the right is the one we had to rip down and then drywall this past week. Here is a better view:

We also boarded up that extra doorway leading into the kitchen to give our room more privacy. Oohh la la :) just kidding. *Ahem*

Once the electrician did all of his work on this wall, putting in new outlets & re-wiring a few things, we decided to insulate this wall as well, for a sound barrier from the kitchen. Again, no pictures of the insulated wall….not very exciting.

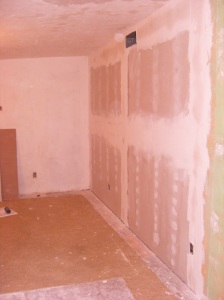
And now we have this:

You can see the mudded ceiling, the drywall, and the no-longer existing doorway to the kitchen :) I can’t wait to get this room painted this weekend.

Painting to me indicates the last step of the process ….the light at the end of the tunnel…. the return of my sanity!!

And as for this wall in the bedroom….we have a little secret to share. The ‘green’ part of the wall was plaster (original from the house) which was 3/4″ thick. Our new drywall was only 1/2″ thick. Therefore, we had 1/4″ difference of wall to ‘feather’ out. It may not sound like much, but it was a huge difference between the 2 walls, and put my mudding skills to the test! HA! I’m hoping it looks ok once painted, but perhaps the pros will shun us from ever drywalling again. OKAY by me! But heck, you have to do what you have to do. And I’ve feathered this puppy even farther than the pic shows (that was only the 2nd coat!).

So on to painting tomorrow. I can’t believe the master bedroom is only 1-step away from being finished! As well as our walk-in closet who will also get a fresh coat of paint. And maybe we’ll even get a chance to tackle the dining room wall and kitchen :)

Stay tuned….

*Kristin*
HELLO Wood Floors

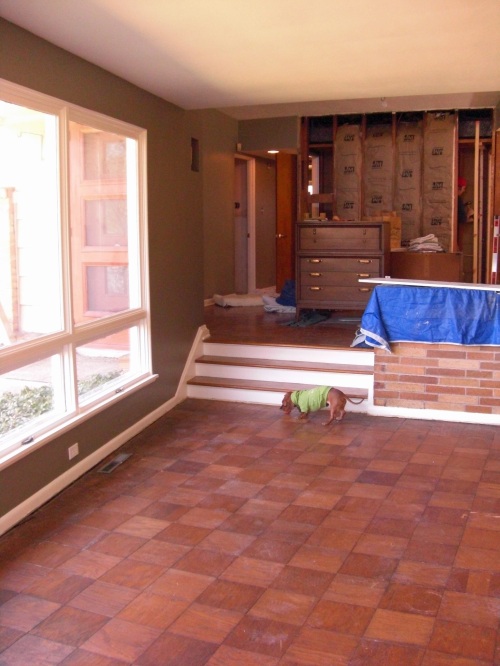
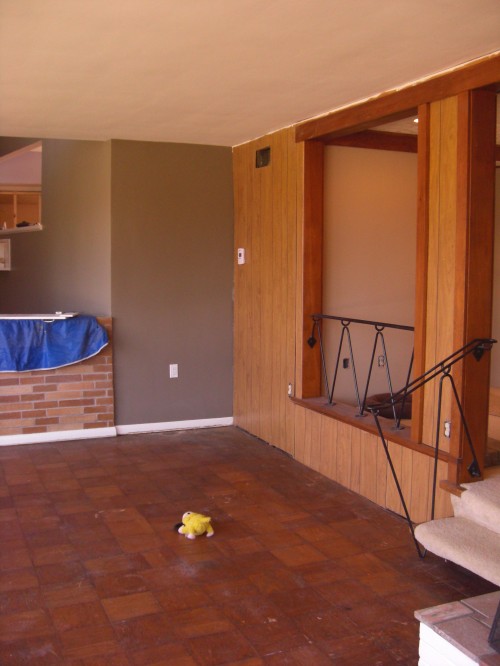
We’ve come a long way since beginning the home renovations just a few short months ago! This past weekend, my mom put the finishing touches on the living room paint and it was finally time to rip out the living room carpet. When Ross & I had first walked through the house before putting an offer on it, but already knew that THIS was OUR house (!), we checked under the living room carpet to see what we would find. Lo-and-behold….hardwood floors! SOLD! So it was just a matter of time before we got that carpet up. After all, I have my Pottery Barn area rug waiting for me in the spare bedroom :)

So now that the living room has been completely painted (half of which ended up on the carpet!!), it was time to get rid of the carpet!

Let’s revisit and take a look back at what the room originally looked like:

Other view of the room:

First thing we did in this room was take down the drapery panels, above the windows:

And then we fixed up the planter, which is still sitting empty, waiting for a ‘shelf’ of some sort to be made (aka ‘added to our project list but not a priority at this point in time!’):

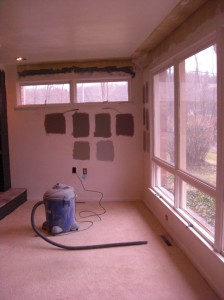
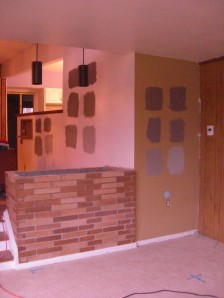
After much deliberation, I picked out my paint colors.  You can see I painted the colors on EVERY wall. After all, the colors look different on every wall, depending on how the light hits it!:

Don’t you just love how I don’t bother to pick up after myself before snapping a pic?! Please don’t mind the Shop-Vac :P

I knew I wanted a gray color, but after painting a few samples on the walls, some of the grays were too cold and ‘concrete’ looking. BUT I finally found the perfect mix between ‘gray’ yet ‘warm’ b/c of the hint of beige in it, when light hits it just right :)

I didn’t get any ‘during’ pics while painting, but basically, my friends and family offered to lend a hand when it came to painting, and it was a godsend. They made such progress, and what a difference just a few cans of paint can make!

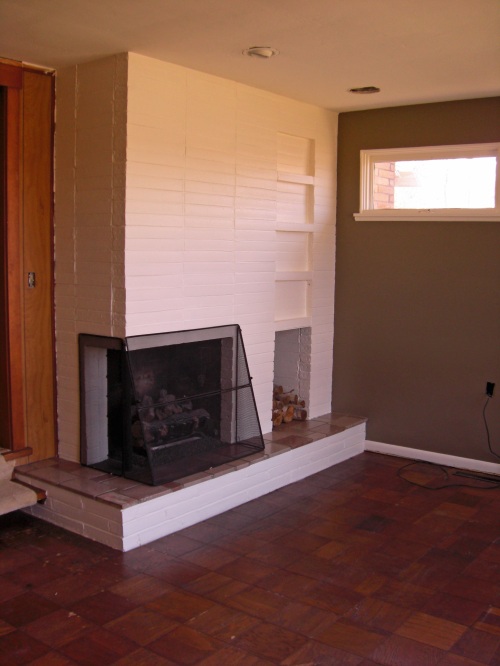
This weekend, my mom finished touching up the trim in the living room (which we’ve been converting to white) and finished touching up the fireplace (which was also converted to white), so it was finally time to rip up the carpet since we would no longer be making a mess in this room!

Are you ready to see??

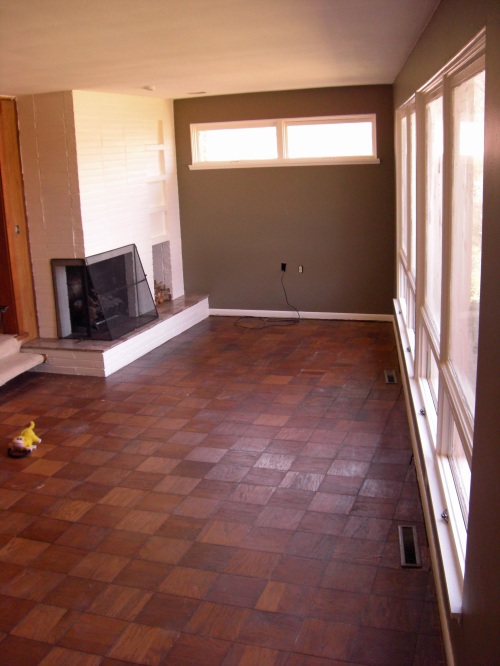
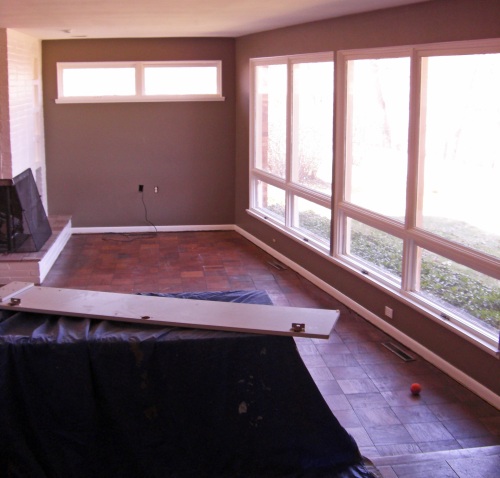
I LOVE the gray wall color with the wood tone in the floor. And the white fireplace really freshens up the room!

Ok, ok, I’ll stop blabbing and share you the AFTER photos :)

3…

2….

1!

Ta dah!

The parquet floors carry over into the dining room, making the whole house feel larger.

I love how ‘freshened’ up the fireplace looks now that it’s been paint white! It really brightens up the room.

We also painted the entryway and dining room, which I’ll share with you later!

And in case you were wondering about the ‘wood paneling’ in the living room (in which I used quote marks around wood paneling, b/c it is indeed faux wood paneling), we’ll be taking that down soon b/c it’s already falling down and ‘wavy.’ And then we’ll put up new drywall and paint it gray to match the rest of the room.

So that’s where we’re currently at! Slowly making our way and headed towards our May 1st move-in date :)

*Kristin*
Whatcha Whatcha Waitin’ For

I don’t think anyone will get the reference in the title unless you’re super obsessed with Brit’s new song like me! 

Whoa oh oh oh oh OH oh…..Keep on dancing ’til the world endssssssss…..

Ok, sorry….it’s a bit hard to sing along and type at the same time! But I’ll try my best :)

*ahem*

After badly neglecting this blog, I’m back with an update. A BIG update. Ross & I have been working like crazy every night and every weekend, trying to get the house move-in ready by May 1st (our tentative hopeful goal).

Here’s a little update on what we’ve been up to…

Ross got the wall up for our new walk-in closet in the Master Bedroom a few weeks ago:

Since then the electrician has gotten all the wiring done in the house, allowing us to finally start drywalling. The door isn’t quite installed yet, it’s only propped open holding itself up! But you can see where the new light switches are, and that recessed white box in the wall will be for our future wall-mounted flat screen tv for prime tv-watching-while-eating-relaxing-in-bed :)

Remember this??

That was our hideous ceiling in the master bedroom, straight out of your standard office?! It was ugly. So we tore it down. Why not add to our project list, right?! Especially when we had no clue how we would fix this, just that the current ceiling HAD to go! And then we did a lot of this:

Ross had to go ahead and screw 4″ screws into the ceiling. The ceiling was currently being held up with nails that were slowly pulling out. Great. Nothing like having your ceiling fall down on you when you’re sleeping! So we fixed it. And I can safely tell you that our ceiling is never coming down now! We also had to manually scrape off all of the glue that was holding up those ceiling tiles. That was a painstaking process.  And we were also left with holes in the ceiling where the old fluorescent light fixture was that we removed. What can I say…fluorescent lighting isn’t exactly the most calming?! It had to go:

Now the ceiling was ready for mudding after Ross patched the hole where the flourescent light fixture was. Bring on the texture:

Betsy & I began mudding it by hand with drywall compound to see how it would look. We put up a thin layer of mud and then go back over it lightly with the putty knife to give it a bit of texture. It’s coming along great and I’ll give you an updated pic once I’m all finished! I’ve made quite some progress since this photo. Also, notice the light bulb??  It’s so great having light in the house. Thank you new best friend electrician :)

Moving on, remember this problem?

Mold Alert! Ugh. What a nice surprise when we removed the wallpaper in the master bedroom. So we cut out the drywall, and the first layer of styrofoam that they used for insulation.

Now we have a clean slate :) Is anyone else confused why the previous homeowner’s needed 3, YES 3(!), outlets within 4 feet of each other?! Humph. Granted, I know sometimes it seems you could always use more outlets, but there are a total of 15 outlets in this bedroom alone. I think we were able to part with just a few. So we asked our new best friend to fix that too :)

Ross got the new layer of styrofoam in, and a new piece of drywall.  I did the mudding for the drywall seams. This was only my first coat of drywall mud on the seams, so it’s not ‘feathered’ too far, in case you were curious. But back to the drywall mudding, I love it. Maybe a little too much. I like to consider myself a pro at this point since I did many more seams after this one :)

Last but not least, remember the original closet we removed?

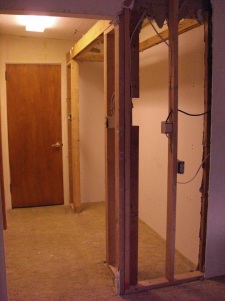
We decided to tear it out so that our entrance into our room wasn’t directly through a closet (since we closed off the 2nd doorway, more on that later). This was one of our very first projects. Here it is down to the bones:

And then gone:

And here’s what we currently have:

What a nicer entrance into our room, huh? Once I get some decor up on that wall, and possibly put a dresser or vanity along that wall, that space will feel like it’s always belonged.

So it’s all coming along now! This is the part of the process that I looked forward to, where you finally start to put things back together and see your improvements and hard work pay off :) I can’t wait until it’s completely finished! Aside from the master bedroom, we’ve been painting the living room/dining room/entryway like maniacs, and I plan to update you with pictures on that soon!

*Kristin*
Our First Big Purchase

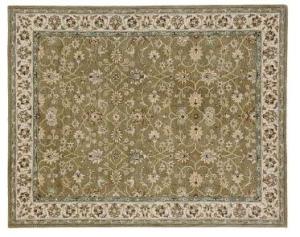
Finally! A decision has been made. After months and months of searching, I finally decided on our living room area rug. Are you ready for it?!? Are you?? Because I’m pretty excited to share it with you!….

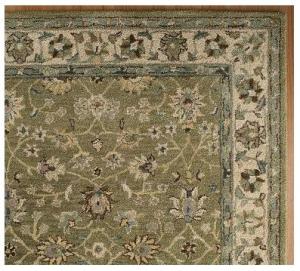
Ta dah! It may not seem like much. But here’s a close-up….

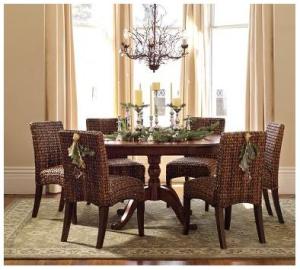
And here’s how gorgeous my house will look after I bring it home….

Ok, ok, just because I’m buying a PB rug doesn’t mean my house will instantly be transformed into awesome, but a girl can dream, right? 

At least I hope so.

It may not seem like a big deal to most people to finally decide on a rug, but this is huge for me and very exciting, for a few reasons…

1. I wanted the rug to set the tone for our ENTIRE house (talk about pressure!), and give me some colors to play around with. Right now, our house is a blank slate, and I needed a starting point. Something to tell me what colors the walls in our house should be.  Something to tell me what colors would be great to accent with when it comes to toss pillows, decor accessories, etc.! I like the pallet and overall feel of the rug. But more importantly, when you look closer, there are shades of yellow, beige, blue, gray, brown and green. So many colors to play around with!

2. I wanted a pattern that I wouldn’t tire of easily.  Something that was still modern, yet timeless.

3. The biggest dilemma was price! How much should we spend, what’s the ‘going rate’ for an 8×10 rug? Of course, I’d love to spend nothing b/c I’m cheap like that, but that’s not realistic. So after months and months of searching, I knew what we were comfortable with spending. I still went a little over our budget, but since this rug was PERFECT in every way, and with Ross’ approval, since he liked it too, we went ahead with it! I did manage, however, to do a few things to take the price down a bit.  I used some of my credit card cash-back bonus to buy a $100 PB gift card, score! I always save up those bonus’ and never know what to use them on, so I’m glad I finally took advantage of it. I also decided to forgo shipping it to our house, and buying it at our local PB store instead, saving me $90! The grand total will come out to $540 (includes tax). It may seem high, but we can justify it after seeing what’s out there, and doing months of painstaking searching.

4. Lastly, the selling point of the rug… I have dreamed of painting our living room walls gray for quite some time. I’m a bit obsessed with the color. Little did I realize how HARD it would be to find a rug to compliment gray walls. I guess it’s not a widely used color. To my surprise, when I ordered the rug swatch, lo-and-behold…..there are specs of gray throughout the entire rug! Heart be still *ahem*

So that’s my story of how one rug can transform an entire house, or at least I hope so. But now we’re now able to start painting! And I can’t wait to see it all come together.

*Kristin*

Homemade Laundry Detergent

When Ross & I started this blog, not only did I want to document the changes of our first home, but also wanted to share ways that we try to live ‘greener,’ live on a budget, and share anything home decor related!

So here we go on one of my favorite ways  to save some money in our household….Homemade Laundry Detergent!  It’s so simple and cost-effective, you’ll wonder why you’ve been buying all those expensive laundry detergents for so many years. And it makes me feel good to know that our detergent doesn’t have any added chemicals or scents that could be harmful and are not really necessary in the first place!

This laundry detergent recipe makes a powdered detergent. There are ways to make your own liquid detergent, but after reading quite a few different recipes and doing my research, it seemed like a lot of hassle and trouble for the same result as the powdered version!

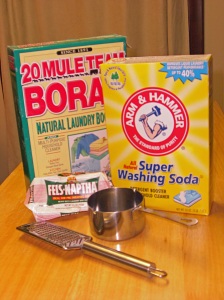
First, let’s take a look at what you’ll need:

20-Mule Team Borax (1 cup)
Arm & Hammer Super Washing Soda (1 cup)
Fels Naptha Soap (1 Bar)
Cheese Grater
Measuring Cup
Food Processor (optional)
Container for finished detergent powder

The Borax and Washing Soda can be found at your local grocery store. If you have trouble finding it, I believe you can look on their individual websites and do a ‘product locater’ search. The Fels Naptha Soap proved to be the hardest for me to locate in my area, but I finally tracked it down at an Ace Hardware, which also carried the Borax & Washing Soda. Score! I also read that you can substitute Fels Naptha Soap for Ivory, or any other type of bar soap, but I haven’t tested it and don’t know if the results would differ. I prefer Fels Naptha because the package specifically says “Heavy Duty Laundry Bar Soap” under the title.

Now on to making your detergent…

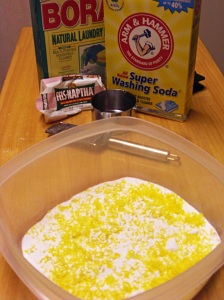
First, you need to grate your bar of soap. This is the most time consuming step! I use a separate cheese grater that I purchased at the dollar store so as not to ruin any of my good ones that I use for cooking. Once the soap is grated, mix it with 1 cup of borax and 1 cup of washing soda.

Next is an additional step that I added after I read a few reviews about the grated soap pieces in the laundry detergent not dissolving enough in cold-wash loads because the grated pieces were still too large.

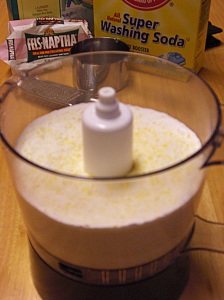
I throw all of my mixed detergent into my food processor to really chop it up into a fine powder, so I don’t have to worry about anything not dissolving!

Also, you can use the same food processor that you use for cooking. No need to have an extra one on hand! I just make sure that I wash it well afterward, and haven’t had any problems yet.

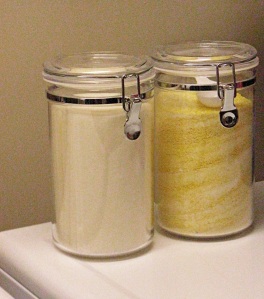
Lastly, pour all of your powdered detergent into a ‘shabby-chic‘ container, and *voila* …you’re ready to ask your husband do laundry yourself :)  You only need 1 (tablespoon-sized) scoop for a medium load, and 2 scoops for a large load. I usually double the recipe when I make it and it lasts me for about 6-8 months! Well worth the little bit of time and effort. We’ve been using this detergent for about a year now, and will never go back to the store-bought brands!
How handsome these look. The container on the right is my freshly made double-batch of laundry detergent and the one on the left holds all of my dryer sheets. And here’s another tid-bit, I buy the off-brand dryer sheets to save a few dollars and store them in this airtight container, so that they hold their fresh scent longer.

Lastly, I should mention that I have a front loading washing machine, and this detergent works great since it is ‘low suds.’ Also works on the standard top loading machines!

Happy Laundry-ing!

*Kristin*